All You Need to Know About Creating a Wildlife Habitat

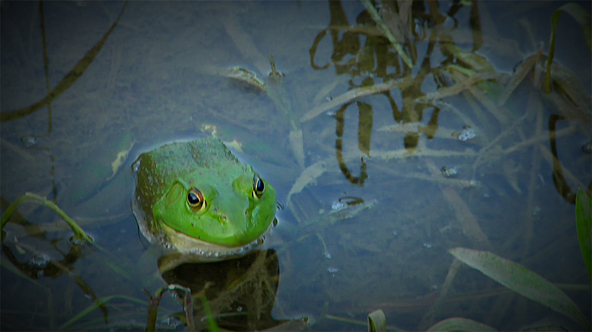
a frog relaxes in a pond designed for wildlife

As spaces and opportunities for natural ponds and bog areas decline, so do the amphibian population and those of other pond creatures. You can help redress this by creating a wildlife pond in your garden. The first thing to note is that wildlife and fish – such as goldfish or carp – are pretty much incompatible. Fish generate large amounts of waste and also eat the eggs of other creatures. There’s no reason why you shouldn’t have both types of pond but you need to keep them separate.

When planning a wildlife pond you need to choose the location carefully. You need an area that gets roughly equal amounts of sunlight and shade. Ideally you should have dappled shade from trees or shrubs. Too much sun and algae will take over, too little and creatures such as tadpoles won’t be able to develop.

For a wildlife pond it is important that part of it is at least three feet deep. This ensures that if the surface freezes in winter there will be water lower down where wildlife can survive. Make sure too that at least two-thirds of the edges have a shallow slope, like a beach, to ensure easy access for wildlife.

You will of course need a pond liner as you would with any kind of pond. Ensure you add twice the depth of your pond to the length and width when measuring this. If you want to be green then instead of using sand or underlay to protect the liner you can use a layer of old newspapers – but make sure you take out any metal staples.

When you’ve filled your pond you can trim the excess liner but be sure to leave an overlap of six inches or so. You can tuck this into a slot in the ground and lay turf or a thin layer of soil over it to provide a natural edge. Stone edges and high banks are not friendly for wildlife.

Since the water used to fill your pond will be chlorinated tap water you need to allow time for the chemical to dissipate. You can help things along by adding a bucket or two of rainwater. Put a couple of shovel-fulls of soil in the deepest part of the pond to create a muddy bottom, try to make sure that this soil is free of chemical fertilisers or weedkillers.

It will take some time for wildlife to populate your pond naturally. However you can give things a helping hand. Visit a local natural pond, taking with you some clean plastic bottles and collect a couple of litres of water. This will be full of organisms and nutrients that will help kick start life in your pond.

You’ll also need some plants of course. A good start would be a couple of aerating plants, a water lily, a water iris in the shallows and perhaps some bulrushes. Make sure you choose native plants that won’t take over and choke your pond.

Allow some of the grass around the pond edges to grow long. This provides shelter for frogs and also lets insect larvae to climb up out of the water. You should also choose a shallow area of the pond and place a couple of bricks under the water – be careful not to damage the liner. Lay a flat stone or broken paving slab on top of these to allow a place for frogs to climb out of the water and sunbathe. If you have a rockery close to your pond you can encourage toads by creating cave-like areas using small plant pots turned on their side.

Your pond will probably need some on-going maintenance. Thin out any pond weeds so that at least half the surface is clear water. This is best done in mid to late summer or early spring, before the spawning season, so as not to disturb too much wildlife.

If you follow these tips you should be able to create a haven for wildlife in and around your pond.

If you’re building an aquatic wildlife habitat it’s important to use good pond liners to ensure long life and prevent leaks.
Top Ten Places to Film Fall Color in the United States


There are really only a few places in the US where fall colors can be enjoyed at their best, and the following list will help you if you want to see and film some of the most spectacular fall scenery anywhere. The list can also help to save you time and money by not visiting those places that may be somewhat disappointing.

1. Columbia River Gorge, Oregon
In addition the the beautiful colors of the trees that line the gorge, the gorge also offers plenty of fascinating geological features. One of the highlights is the many maple trees, which guarantee some great photos, and the entire area is within easy reach of Interstate 84.

2. Washington County, Maine
One advantage of this area is that is within easy reach of many other parts of Maine, and the drive here is worth it during the fall for the vibrant and spectacular reds and oranges of the leaves. In addition to the fall colors, do not miss the chance to sample a local specialty, the delicious blackberry pancakes.

3. Lake of the Ozarks, Missouri
This area is well known for its Independence Day celebrations, although it is a pleasure to visit any other time of the year, especially when the leaves show their colors during fall. A boat tour guide can take the most dedicated nature filmmaker out on a trip to ensure that the best shots are not missed.

4. Lake Champlain, Vermont
Vermont is well known for its beautiful fall foliage and this is one of the best places in the north east of the country to enjoy the fall colors. If you are wondering how to film nature at its best, simply set up your camera here and point.

5. Hudson River Valley, New York
Within easy reach of New York City, this area is a great destination for anyone wanting to capture some fall colors at their best.

6. Cypress Valley, Texas
Another great destination for anyone wondering how to film nature. The leaves in the area turns yellow during the fall and offers the opportunity to take some great video footage.

7. Grand Teton National Park, Wyoming
The trees in this famous park look their best during September, making it a great place for anyone wanting to shoot some great nature footage earlier in the season.

8. Great Smoky Mountains and Asheville, North Carolina
One of the most visited national parks in the country, the Great Smoky Mountains area is wonderful to visit any time, although fall is spectacular. An unforgettable way to see the area and get some great photos is from a hot air balloon ride.

9. Yosemite National Park, California
An experience that anyone living in California should take advantage of, Yosemite is familiar to most of us from film and television images and is a wonderful destination for any serious or amateur nature filmmaker.

10. White Mountain National Forest, New Hampshire
Another great fall destination for those living in the north east of the country, the White Mountains offer spectacular views as far as the Atlantic on a clear day. A great way to experience the area is by a train ride up to the summit.

Fall is the time that nature comes alive in colors!

Make a Birdhouse Gourd


Make a Gourd Birdhouse

Gourds are ready for birdhouse making in late summer or early fall in most places. Gourds make excellent birdhouses when hollowed out and prepared. Here’s how to use gourds to make birdhouses for your backyard birds.

Gourd Selection

Choose gourds that are free of blemishes, the so-called bad or rotten spots. Make sure the gourd has time to dry completely before preparing if for the birdhouse. Make sure the gourds have fully matured before they are picked as this may cause them to dry incorrectly. Remember that gourds are in the pumpkin and squash family and may be confused with pumpkins. Pumpkins and squash would rot before they would dry sufficiently enough to use as a birdhouse. Pick gourds suitable for crafts.

The best way to dry gourds is on the vine. Leave them to dry naturally and they will last longer. If you must harvest gourds early, cut them with a large piece of stem still attached and put them in a protected place so they may dry. Be aware that harvesting them too early increases the chances of rot. Wash the gourds to remove any dirt. Make sure the gourds have plenty of room and aren’t touching each other for best results.

Some gourds take months to cure, or dry. It’s worth the wait because properly dried gourds last much longer than those gourds harvested too early and forced to dry under less natural conditions. Many gourds grow mold on the outside. This is normal if rot doesn’t set in. If the sides of the gourd are still firm, you can use the gourd for the birdhouse. If the gourd has turned mushy, it’s time to find another gourd because this one is rotten.

Prepare the Gourd

Once the gourd has been properly selected, you can start preparing the birdhouse. You may take a mild detergent to wash off the gourd before painting it. Use a vegetable brush gently to brush off any lingering mold or dirt before you start to paint the gourd. Dry off the gourd with a paper towel.

Paint the Gourd

If you choose to paint the gourd birdhouse, choose a paint that can withstand the outside elements. Waterproof paints and a finish are recommended. Start with a latex or oil base primer. Primers are generally white base colors. They help the paint stick to the surface. Then apply the paint that you wish. Allow each coat, including the primer, to dry completely before adding more paint layers.

When you are finished with the painting, spray the gourd with a finish. A common finish to use with gourds is shellac, found at most hobby and craft stores and many home and garden stores. Use any sealant made for an outdoor project.

Make the Birdhouse

After the paint has completely dried, wait another day to be sure the paint and finish is dried. If you decide to leave the gourd in a natural state, skip the painting part and make the birdhouse. You can use a special drill bit, called a holesaw, to drill the holes or you can use a knife to cut out a hole. This is where the birds will enter the gourd to make their nest. Scoop out any leftover flesh and seeds with a spoon or stick. Do this carefully so you don’t damage the gourd or paint job.

Attach a strong wire to the stem of the gourd. You can run the wire through the stem nearest the gourd for better results. Hang the gourd birdhouse in a place where birds will find it safe and easy to reach.

Photographing The Beautiful Iowa Woodland Wildflowers


What was once a land of grasslands, immense prairies and undeveloped savannahs, Iowa has experienced vast changes over the last one hundred and fifty years. In spite of the drastic human development, the woodlands remain the most enduring remnants of Iowa’s biological population. In early spring, the woodlands seem to explode with life layer by layer. The first Iowa woodland wildflowers begin peeking through layers of fallen branches and dead leaves. These spring woodland flowers are some of the most colorful and abundant.

The first to bloom, usually in April, are the light pink-white or blue Hepatica, white Bloodroot that “bleeds” a reddish-orange liquid when the stem is broken, white Trillium, pale pink or white buttercup-like Rue Anemone (Wind Flower) and the aromatic drooping Dutchman’s breeches. Early May brings out the nearly hidden maroon flowers of Wild Ginger, Common Violets in yellow, white and violet shades, the blue petal Virginia Bluebells and the nearly stem less white Dog-tooth Violet. Mid-May starts showing the bluish-lavender flowers of Jacob’s Ladder, white and lavender Virginia Waterleaf (named because of the spots on the leaves), and the favorite Jack-in-the-Pulpit pale green flower with the inflorescent center.

Wildflowers in such vast quantities capture the attention of photographers that film nature more than almost anything else. Nothing can surpass the beauty that nature itself supplies for us. Massive fields are beautiful as photographs just as they are, or as backdrops for photo shoots especially of children or for weddings. Each individual flower is beautiful. Often these pictures are seen on postcards or greeting cards. Nothing needs to be added inside to make these a special gift in itself.

If interested in photographing wildflowers at their best, it is imperative to have certain basic equipment. The standard 35mm camera is a must. Adding a close-up lens or macro-lens is preferred for a better outcome. Some nature photographers prefer the 105mm macro lens and others prefer the 50 or 55mm macro lens. The perfect lighting for nature video or still photography is essential. At noon the bright sun will wash out the petal colors, so early evening or morning is the most opportune time for catching the warm colors that pay tribute to the blues, reds and yellows of the petals. Often times a cloudy day is perfect since it serves as a light diffuser. Although natural light is the most ideal, if that is not possible, an electronic flash will sometimes be a good alternative. If it is possible to backlight or sidelight the flowers, it will bring out a radiant glow accentuating the venation in the leaves and petals. Holding the camera steady is nearly impossible, so the use of a tripod or a bean bag to steady the camera is best. When photographing an individual flower you must get down close and personal to the flower to get the best possible picture. Focusing directly at the center of the flower will make sure the brilliantly focused flower, which is your main subject, is accentuated by a blurred background. However, at high magnifications, the depth of field, which is the depth of the image that is in sharp focus, is very shallow. So make sure the most important part of your flower is in sharp focus. Oftentimes when filming Iowa woodland wildflowers there has to be a compromise of a small enough aperture to have all the flower in focus but large enough so that you are maintaining a blurry background to make the flower stand apart. The wind can be a major obstacle in trying to get the perfect picture. Increasing the shutter speed on your camera will help alleviate that problem. If the light is dim, you may have to increase the ISO of your camera to accomplish that.

Fortunately, the tall trees that canopy the wild flowers are the last to leaf out. Once they are in full leaf, they block out the sunlight that is necessary for the wildflowers to survive. Regrettably, this marks the end of their season and the Iowa woodland wildflowers disappear until the beginning of the next spring thaw.

How Fire Shaped the Tallgrass Prairies of America’s Heartland


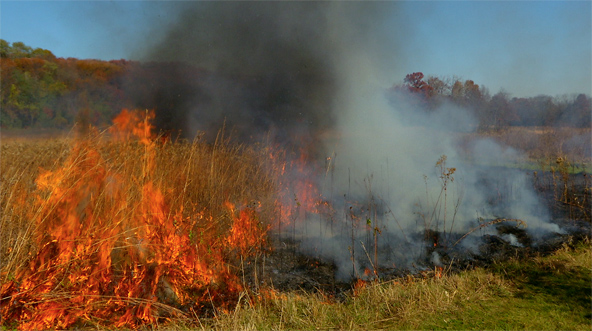
Tallgrass prairie fires were once a common occurrence, and had a considerable impact on nature and wildlife. Such fires were typically the result of lightning strikes that occurred during the frequent thunderstorms experienced by the region. Because of the area’s dry conditions, high winds, and absence of obstructions, fires would spread quickly and could travel quite far. This prevented the growth of woody vegetation such as trees, which resulted in the grass-filled ecosystems that are now seen throughout the prairie states.

Prior to European settlers entering the region, indigenous Native American tribes often started fires as way to manage wildlife. Such fires were a tool to drive bison toward more convenient hunting ground, and the renewed growth that took place after the fire appealed to bison herds, and helped to predict their movement.

The region’s fires even influenced the prairie’s rich soil, which was what first attracted settlers to the area. The fires removed the layers of organic waste and dead plants that prevented necessary nutrients from leaching into the soil. In addition, such waste kept the soil cool, but once removed, the sun’s rays could warm the ground. The waste that results from such fires is easily broken down, and vital nutrients can once again enter the soil, creating the ideal environment for new plant growth. The root systems of prairie vegetation are deep, therefore, even if the surface shoots are burned, regrowth takes place quickly.

The tallgrass prairie is a severely endangered ecosystem. Although much of this danger is the result of habitat loss due to development and farming, the decrease in natural fires has had a considerable impact the on undeveloped prairie tracts. Woody vegetation and invasive plants are no longer restrained by fire and are starting to invade these ecosystems. The dead plant waste layers are allowed to accumulate, impacting the growth of various grasses. This will ultimately change the very roots of the Tallgrass Prairie Ecosystem.

Due to the aforementioned considerations, wildlife management agencies are developing a strategy of controlled fires to help the prairie ecosystems survive in the most natural way possible. This is typically accomplished by carefully selecting a day during the most suitable time of year, and creating a controlled burn. Firefighters are present to ensure the fire does not burn out of control. This is an effective and safe avenue through which these natural areas can be restored to their original state.

While common sense dictates that fires are destructive and dangerous, it is essential to understand that they are vital to the maintenance of prairie ecosystems. With carefully managed burns, renewed growth can be encouraged by wildlife management agencies, and our prairies can be restored to their natural condition.

Nature And Wildlife Is Under Attack

Whether the results of the human population are intentional or not, the fact remains that nature and wildlife is under attack. Much of global population has lost sight of how important the natural world is to the quality of life for people and the sustainability of the world that we inhabit. There are many signs that the behavior of man is causing great damage to the planet and if allowed to continue, the world could become a much different place for all life on Earth to exist.

The root cause of this colossal problem is the unnecessary consumption enjoyed by man. When things are taken from the world that cannot easily be replaced, the world suffers a great loss. Much of what is taken to benefit people is at great expense to the other animals we share this planet with. For example, when people take on massive building projects that require newly produced materials, wildlife experiences habitat loss. Through deforestation, civilization is constructing a world for man to live in, while taking away the environment that animals depend upon.

Filmmakers are the first line of defense in this war for the world’s resources. They have the daunting task of showing the damage being created to the rest of the world. Without these efforts, people would never become aware of the effects of human behavior. Hearing or reading about the possible effects of some action is not as powerful as seeing the actual damage. Discussions without evidence and images do little to improve this situation.

Sometimes the damage done to wildlife comes in the form of a direct assault on the animals themselves. Poaching is the illegal killing of large numbers of animals for some unnecessary luxury. Taking buffalo for their skins or elephants for their tusk and leaving the remaining parts of these animals to waste is the cost of this action. Other times the assault on animals comes from accidental events. Oil spills that occur in the process of acquiring and transporting resources people need to maintain their quality of life, have devastating effects on the animal populations in these areas.

When someone is able to film nature following one of these catastrophic events, people are able to see the damage as it happened. Other larger more complex situations may not be as easy to record. Climate change cannot be displayed in any one event. This requires that the symptoms that lead us to the greater problem be gathered together. This makes a puzzle that must be constructed one piece at a time until the entire picture becomes visible.

All of these examples combined with the endless lists of humans destructive behaviors, display a picture of what irresponsible action looks like. Much of the luxury enjoyed by civilization directly affects nature and wildlife. Some of these results are easily visible and require little debate as to the cause and possible solution. Others are much more complicated and a different approach is required. Finding a way to responsibly deal with human wants and the planets needs is the challenge for all people.

A Free eBook for Taking Better Nature & WIldlife Video


I’ve been working on a new site for quite a while now. A site that will help people shoot better nature and wildlife video. It doesn’t matter if you’re a beginner learning to shoot video or a seasoned pro. My goal is to provide something for everyone.

While I’m working on developing the content, I put together a free eBook with ten no-cost tips that will help you shoot better nature and wildlife video right now. These are tips that if you’re not using them right now can instantly make a difference in your footage.

You can find out more about it by clicking HERE

One feature of the new site is entitled “It’s Your Nature”. Here I’ll post articles on such topics as attracting butterflies to your garden.

I’ll also be creating video tutorials on how you can shoot better video. I’ll cover topics such as why you should manually white balance to how to protect your gear in the cold.

But I really want to hear from you! I want to know what you are wanting to know more about. Is it how to use a slider or why would I use a grey card? Maybe it’s how can I get closer to wildlife or where’s the best place to film grizzly bears? Leave a comment and let me know what topics I should be focusing on.

In the meantime, download the free eBook and start shooting better nature and wildlife video today!

Best Challenge Ever?

I’m in the middle of another UWOL Film Challenge. The theme for this challenge is “Renewal.”

So far I’ve shot some fantastic footage. Maybe some of my best. I find myself chomping at the bit in anticipation waiting for the next opportunity I can get out and shoot for this challenge.

The new camera is simply amazing. The quality of the footage continues to blow me away. While they may announce a new version of the camera this month, I think it’ll be hard to beat what I’m getting right now. It’s simply stunning.

This also may be the most personal challenge I’ve done for the competition. Maybe that’s why I find myself so anxious to get out and shoot for it.

The film is due on September 20th. So, certainly not a lot of time to tweak it so it’s just right.

I’m going to try and shoot the one crucial scene tomorrow. If I don’t get that shot then the whole film will fail. So, it’s really, really important that I get this shot and I get it right. I’ve been trying for over a week to try and find a way to make it a simple shot and still make it clear what is going on without looking too cliche. I guess we’ll find out tomorrow if I was able to pull it off or not.

I’ll be up before sunrise tomorrow working on getting some more shots to fill the gaps in the story before I head out for the big shot of the day.

There’s nothing like being out in nature that moment just before the sun peeks over the horizon. There’s no way I can describe the feeling. It’s as close to being magical as anything can be.

I hope tomorrow is a good day! I’ll keep you posted!

It’s POC time!

There’s a project I’ve been wanting to do for over a year now. But in order to do it right I really needed another HD camera. I suppose I could have used one of my SD cameras but if I was going to do it right, I should go ahead and invest in another HD camera.

So after a lot of research and talking to people I finally bit the bullet and ordered another camera.

The thing about this camera is that it’s tiny. Tiny enough that no one would pay me much if any attention. It seems now days, that’s becoming more and more important.
The other reason I wanted a small camera is if I have to bring two complete camera systems into the field, I need something that’s not going to weigh a ton and be able to fit in the bags I currently own along with my other HD camera.

This one fits the bill on both of those.

The scary thing is that this little dynamo is capable of create better footage than my big camera. The downside is that it lacks a lot of the tools my other camera has to allow me to take some fantastic footage.

So it’s another learning curve to figure out what works and what doesn’t. Tweak a setting here, adjust a little there.

But I think it’s all going to be worth it. I feel I have the right tool to start on my project which I think is going to allow me to pursue a life of filmmaking.

Just a few more tweaks and I think I’m good to go.

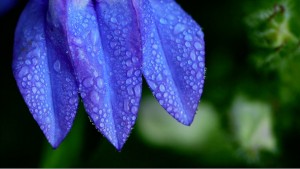
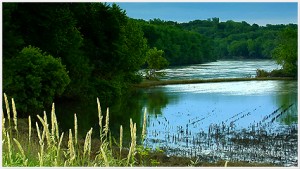
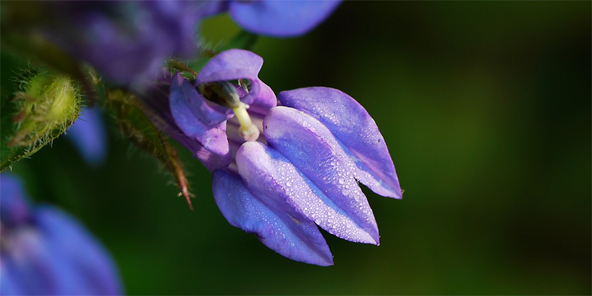
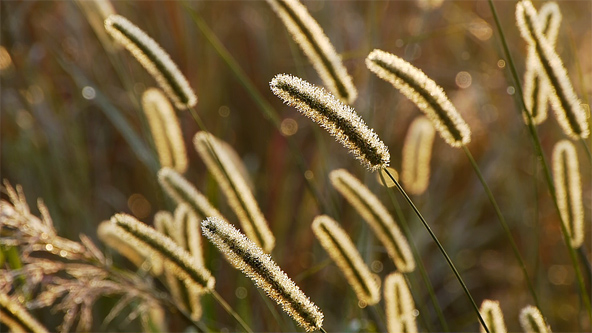
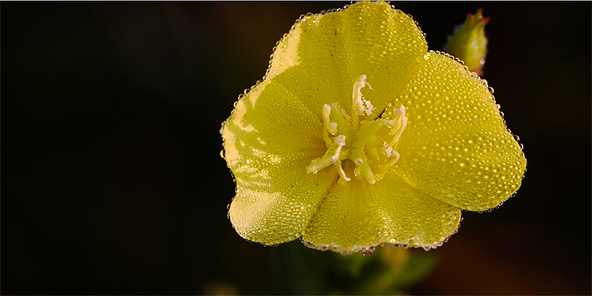
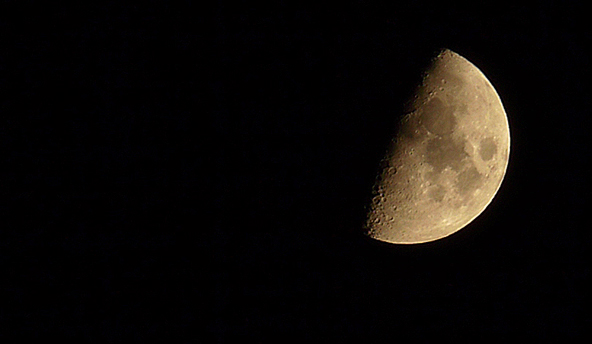
All the images on this page are grabs from the new camera. Below is some footage I shot today at one of my favorite local haunts, Indian Creek Nature Center. Another Proof of Concept video to see if the camera could in fact do what I needed it to do.

So what’s this big project that required a second camera? All I can say is stay tuned, I’m working on it!

[flv:http://www.silverphoenixllc.com/phoenixblog/movies/Prairie_GH1.flv 592 331]

Film Festival Selections

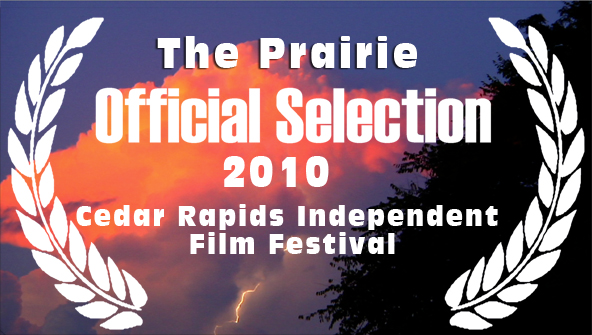
I’m proud to announce that two of my films have been chosen as official selections of the 2010 Cedar Rapids Independent Film Festival April 9-10, 2010. Collins Road Theatres
Marion, Iowa 52402 319-377-4555

“Silent Kingdom” is a 3:10 long PSA style film calling people to action to save our environment.

What people are saying about “Silent Kingdom”:

I got to say this is a another triumph of imagery for you Kevin. I always love to see what you come up with ! In every one of the these challenges, there are those that give the rest of us new goals to work toward, and you are always on that list. Thank you for that.
Chris J. Barcellos

Kevin, Kevin, Kevin…..Have you ever shot an image that was not just flat out beautiful??
You are the king of gorgeous….seriously….
Nicely done, nice message…the text was perfect!

Bob Thieda

Wonderful imagery as always. The words short and to the point. Having watched several short environmental films on a big screen last night, I can say this beats the pants off all of them.
Annie Haycock

“The Prairie” is a 3:00 long film about the cycle of life in an Iowa tallgrass prairie.

What people are saying about “The Prairie”:

Another beautifully shot film. The editing was spot on and had a good pace to it. The insect shots were great, especially the one of the spider and droplets of water. You clearly made use of the good light.
Mihali Moore

Probably your most stunning camera work yet, Kevin…
Meryem Ersoz

It is an enjoyment to observe your film. You have a good taste for joining pictures, music and words, -a feeling of art.
Finn-Erik Faale

You really captured the magic here.
Mike Sims

Cedar Rapids Independent Filmmakers began with the first Cedar Rapids Independent Film Festival in 2001. The Festival was created to provide a venue for Iowa filmmakers to screen their work for peers and general audiences. For every filmmaker whose work is admired by audiences in megaplexes across the world, thousands more lack the means to show films to the masses. The greatest reward for an independent filmmaker is to have their work shown to an captive audience. One festival entrant commented what a wonderful feeling it was to observe an audience reacting to his film and laughing when they were supposed to laugh!

The Cedar Rapids Independent Film Festival was created to provide a venue for Iowa filmmakers to show their work and for the general public to view the best of the state’s filmmaking industry.

CRIFM also publishes the Iowa Film News Update, a newsletter featuring screenings, casting calls, festivals and other news of interest to Iowa film enthusiasts.

The organization’s primary goals are to encourage Iowa independent filmmakers to continue improving their craft, to provide a place to specifically showcase Iowa-connected films, present a unique cultural event to the community, and to offer networking opportunities for the purpose of building the Iowa Filmmaking Industry.

Check out the 2010 film schedule here for times.